Okonomiyaki

Grilled as you like it

Ume-shu chicken November 26, 2008

Filed under: Cooking,Japan,recipes — laurel @ 10:14 pm
Tags: , , , , , ,

ume-chicken

Here’s a great recipe that I’ve made several times from my (sort of) new bento cookbook, Yappari Ohiru wa Obento (Of Course, Lunch is Bento). It’s super simple and quick, so I make it when I want a flavorful main dish, but I don’t want to spend a lot of time cooking. If I use two boneless chicken legs, there is enough for dinner for Alex and I and enough leftover for the next day’s lunch. With salad or vegetables and rice, it makes a great meal! The basic recipe is just ume-shu, soy sauce, and chicken, but last time I made it I added one of the ume from the bottle of ume-shu, chopped-up, and a splash of rice vinegar and Alex declared it the best one yet! I am thinking about adding some garlic or shallots next time for a different flavor too.

I use whole, boneless chicken legs for this recipe. You can read my previous post about why I don’t like boneless skinless chicken breasts here. I also read this great article in the San Francisco Chronicle a few weeks ago about chicken thighs as an economical alternative to chicken breasts. If you don’t like dark meat, or prefer chicken breasts, you can substitute them for the legs. Likewise, if it’s difficult to find whole boneless legs at your store, you can use boneless thighs instead. I recommend that you leave the skin on, however, as it adds fat and flavor to the dish, and it looks nice when it’s browned and glazed with the ume sauce.

Ume-shu Chicken
adapted from Yappari Ohiru wa Obento

2 boneless, skin-on chicken legs (drumstick + thigh)
2/3 cup ume-shu (Japanese sweet plum wine)
1 tablespoon shoyu
1/2 tsp rice vinegar
1 ume (from the ume-shu), chopped (optional)

Trim excess fat and skin from the chicken legs if desired. Heat a large skillet over medium-high heat. When the pan is hot, place the legs in the pan skin-side down, arranging them so that they are evenly thick and not overlapping. Brown the legs on both sides. Drain the excess fat from the pan if there is a lot of it (save this for frying eggs or potatoes if you like). Next, add the remaining ingredients. Cook, uncovered, until the liquid reduces to a syrupy glaze. Flip the chicken a few times to coat evenly with the sauce.

To serve, allow the chicken to rest for 5 to 10 minutes. Slice on the bias. Drizzle with sauce before serving.

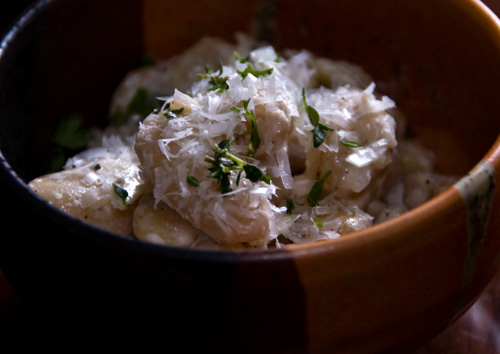
 

Giant white bean and chick pea salad September 21, 2008

Filed under: Cooking,Japan,recipes — laurel @ 10:30 pm
Tags: , , , , , ,

I’m excited to try some recipes from my new salad cookbook, おなかいっぱい サラダ (Onaka Ippai Salada, Full Stomach Salads). Although most salad cooking is more assembling than cooking, I had bought the book because it featured a good variety of Asian flavored salad dressings. I’m hoping to make more dressing at home instead of buying bottled dressing so that I can be sure that I’m eating only wholesome or at least recognizable ingredients with my healthy salad lunches.The book also has some interesting salad combinations that I’m looking forward to.

The first recipe that I tried was a recipe for a creamy two-bean salad. The beans are chick peas and Japanese white beans, which are much larger than typical white beans that I would find at home. Make sure to soak the beans and cook the two types separately in case they don’t cook at the same rate. The recipe also features the ever-popular Japanese kewpie mayonnaise. I substituted rice vinegar for the white wine vinegar since that’s what I have on hand and the flavor was fine. In addition to the fresh parsley called for in the recipe, I also added some minced fresh thyme. The earthy flavor of the time was a good match for the otherwise simple flavor of the beans and mayonnaise. This salad made a great simple and tasty side dish for my lunch.

白いんげん豆とひよこ豆のサラダ
White Bean and Chick Pea Salad

adapted from Komatsuzaki Akemi, Onaka Ippai Salada

80 grams dried giant white beans (190 grams cooked)
80 grams dried chick peas (190 grams cooked)
1/2 tablespoon white wine vinegar
salt and ground black pepper to taste
1/4 clove of minced garlic
1 tablespoon minced white onion
1 tablespoon mayonnaise
grated Parmesan or Romano cheese to taste
minced parsley (or other fresh herbs) to taste

Soak beans (separately) overnight. Boil until tender. Drain.

Put white beans and chick peas in a bowl. Add vinegar, salt, pepper, garlic, and onion. Mix. Refrigerate until chilled.

Add mayonnaise. Mix.

Before serving top with grated Parmesan cheese and minced parsley.

copyright 2008 LMS


Shokutaku tsukemono ki August 21, 2008

shokutaku tsukemono ki

One of the easiest ways to make Japanese style pickles is to use a shokutaku tsukemono ki, or tabletop pickling pot. I picked mine up at Besia recently for under 1000 yen ($10). It’s pretty small, but makes about the right amount for lunch or dinner for two. To use it, I just chop some vegetables (I like a mix that can include cabbage, cucumber, carrot, turnip, daikon, etc.), rub them with salt, throw in some seasonings like ginger, myoga, or kombu, and then put on the lid and screw it down. The pickling pot has a screw and spring-plate combination that applies pressure to the vegetables, helping to squeeze out their liquid and create a brine that they pickle in. If left at room temperature, your pickles will be ready to eat in just a few hours.

The shokutaku tsukemono ki is a handy device that simplifies the old-fashioned way of making pickles in which cabbages and other vegetables are salted and stacked in large buckets and then topped with lids and heavy rocks so that they can pickle in their own brine. When we visited our friend Tomomi’s grandparents in Okayama last winter we saw their pickling shed, which had several buckets full of home-grown cabbages that had been pickling for a few months or longer resting alongside their homemade miso. The rocks are so heavy that they have a pulley system to help lift them off of the cabbages. Since having a pickling shed like this isn’t feasible for most urban denizens, the tabletop pickling pot is a great kitchen tool for those who still crave the taste of homemade pickles even in an urban environment. There’s a recipe for “impatient pickles,” a quick pickled side dish made with a shokutaku tsukemono ki in Washoku.

quick cabbage, cucumber, and carrot pickles made in a shokutaku tsukemono ki (front)

copyright 2008 LMS


Nuka-zuke August 12, 2008

Filed under: Cooking,Japan,kansha — laurel @ 10:46 pm
Tags: , , , , , , , , ,

Tsukemono – quick cabbage pickles from my shokutaku tsukemono no ki (front) and cucumber nuka-zuke (back)

I’ve been meaning to write about the Kansha Club more, really, I have. I wanted to write about the last few Kansha Club meetings but I never got around to making most of the recipes. It’s embarrassing really, that I have all these great recipes and advice from the author herself, and I just can’t seem to find time to make them. I have, though, gotten more inspiration to try new dishes from Washoku and some of my other cookbooks. But enough about that, on to the pickles.

Our last Kansha Club meeting (the third, if I’m not mistaken) was about pickling. Japanese pickles, or tsukemono, aren’t like the vinegared pickles that you can put up in your pantry forever that you might be familiar with. Some, like nuka-zuke, are quite perishable. There are many different kinds, each made according to it’s own technique, but in essence they are vegetables that have been transformed by drawing some of the liquid out and then developing their flavor with salt, vinegar, fermentation, and so on.

vegetables ready to be pickled, from left: cucumber, turnip, turnip greens

One thing that I have made time for recently is my nuka-toko. Elizabeth shared a few cups of her nuka with interested club members so that we could start our own nuka pickling pots at home. I’ve been tending my pot for the last few weeks by turning it daily and checking the additions. My pot is a 3.6 liter ceramic lidded crock for tsukemono. It is narrow at the top and bottom and wider in the middle. Apparently the straight-sided pots are better for nuka-zuke while this shape is good for umeboshi, but I had already bought the pot when I learned that and actually I have had no problems with the shape so far.

I started with Elizabeth’s nuka and added about a kilogram of iri-nuka (toasted rice bran) that I had leftover from preparing fresh bamboo shoots earlier this spring and several tablespoons of dry mustard (a special blend available in Japan for making nuka toko). I moistened the nuka mixture with water (you can use beer too) and then added a few cloves of garlic, some togarashi chiles, slices of ginger, fresh sansho berries. Then I mixed it up and put the lid back on. Later I added some more items that Elizabeth had suggested: washed, dried, and crushed eggshells and leftover iriko (dried sardine) heads. I turn the mixture daily to mix and aerate it. It has a bit of a sour, almost peanut-buttery smell that I’ve grown quite accustomed to. After about a week it was ready to pickle.

To make nuka-zuke, I scrub my vegetables with salt, rinse, and push them into the nuka, patting the nuka down over the top. In the warm summer, the yeasts in the nuka act quickly, and my pickles are ready to eat in just an hour or two. When you’re ready to eat them, just pull them out of the nuka, turn it, and rinse and slice the pickles. I’ve been sticking with turnips and cucumbers so far, but I think I’ll drop by the pickle counter at my grocery store soon to get an idea about what other vegetables I can make into nuka-zuke.

copyright 2008 LMS


Hiking Bento June 7, 2008

my bento: clockwise from top left, tatsuta-age, veggie sticks and sesame dressing, potato salad

On Sunday we went hiking with my school’s mountaineering club at Mt. Tanigawa. I’ll have more on that later.

I wanted to bring a tasty and filling bento for lunch. I started by making tatsuta-age using a recipe from chef2chef. I’m very proud of how my first tatsuta-age came out. I think that I’ll definitely make them again sometime, but maybe only for special occasions. I don’t usually deep-fry at home, but doing it in a wok meant that I didn’t use too much oil, and since we had an okonomiyaki party that night, we were even able to use up the leftover oil to fry the okonomiyaki. The tatsuta-age was crunchy and flavorful and still delicious, not soggy, on the second day. The garlic and ginger marinade gave the chicken a lot of flavor. Tatsuta-age similar to kara-age, but while kara-age is coated with wheat flour, tatsuta-age is coated with katakuriko. Katakuriko is starch that was originally made from katakuri, a lily that is known as dogs-tooth violet (though most katakuriko is actually potato starch now). We saw some katakuri growing along the trail while we were hiking. It seems like the katakuri must be highly seasonal, as we saw them growing only in a very small altitude range.

katakuri: Japanese dog-tooth violet (unfortunately there was some moisture in the lens, so it’s a little fuzzy)

I completed my bento with an American-style potato salad, vegetable sticks, and inari-zushi. I like my potato salad with celery, red onion, and lots of dill. Red onion is hard to find here, but I found some recently at Shoku-no-eki (a store that sells many local farm products) and I also got some that were grown by one of the teachers at school.

Laurel’s Dilly Potato Salad

3 small or medium potatoes
salt
2 or 3 ribs of celery
wedge of red onion (about one eighth)
handful of dill
kewpie mayonnaise
spoonful of capers
one or two spoonfuls of dijon or whole-grained mustard
black pepper

Peel and dice the potatoes. Boil until tender in salted water. Drain. Taste the potatoes. If they don’t taste a bit salty, sprinkle the potatoes with salt while they’re still hot. Next chop the celery, onion, dill and capers, then add them to the potatoes. Stir together about a quarter cup of mayonnaise with a spoonful or two of mustard and some black pepper. Add to the potatoes and vegetables and stir together. Taste and adjust the flavor and texture by adding more of any of the ingredients. The potatoes should be evenly coated, but not drowned in the dressing. Be careful not to add too much mustard, since it’s flavor seems to get stronger over time.