Okonomiyaki

Grilled as you like it

Onsen Tamago June 3, 2010

Filed under: Cooking,Japan,recipes — laurel @ 10:50 pm
Tags: , , , , , , ,

onsen tamago

onsen tamago being plucked from the water at Kusatsu

In our recent care package from home, I asked for David Chang’s Momofuku Cookbook. Once I got it, I took a look inside and I couldn’t wait to try some of the recipes. Of course, my freezer was still full of frozen crab, so I didn’t want to order the bacon for bacon dashi with potatoes and clams or ramen broth just yet. But that didn’t mean that I couldn’t start with some of the simpler recipes. One of the first recipes that caught my eye was the slow-poached eggs. These are basically homemade onsen tamago, hot spring-cooked eggs. For a perfect onsen tamago (in my mind) the eggs should be in that stage just between raw and cooked, with the whites still a little soft but the yolk starting to firm a bit.

I didn’t have all the necessary equipment, so I bought digital kitchen thermometer on amazon.com. (I had bought a thermometer in Kappabashi about a week earlier, but to my disappointment, it was a baking thermometer. Who knew that some thermometers only go to 50°C. ) To keep the eggs off of the bottom of the pot, I flipped my steamer upside-down in the pot (with the steamer right-side-up the pot would be full the the brim), which kept the eggs just a few millimeters off the bottom, but I think it was good enough. The hole in the steamer also made a good spot to rest the tip of the thermometer. After trying the first one, I found that the whites were a little bit looser than I like, so I popped them back in the water and raised the heat by a few more degrees. If you do this, be careful. You can always cook them more, but once you go too far, you can’t cook them less.

onsen tamago
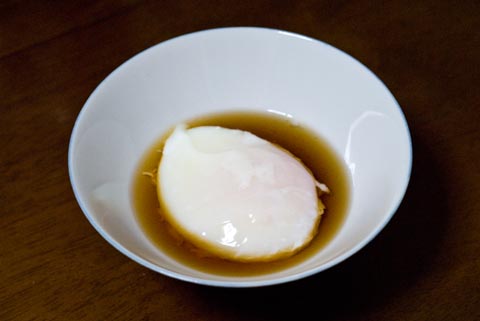
Onsen tamago made using Momofuku’s slow-poached egg technique

For the sauce, I used a recipe from about.com: 1/4 cup dashi and 1 teaspoon soy sauce. Instead of regular soy sauce, I substituted banno-joyu, seasoned soy sauce. I love to have banno-joyu on hand for making a quick sauce for somen noodles, dressing vegetables, making ohitashi, or drizzling over tofu. Plus, it keeps for just about forever in the refrigerator, so I mix up a small batch whenever I run out (It’s also a great way to use up some of the extra shiitake mushroom stems that I have around).

Slow-Poached Eggs
from Momofuku by David Chang and Peter Meehan

large eggs

1. Fill your biggest, deepest pot with water and put it on the stove over the lowest possible heat.

2. Use something to keep the eggs from sitting on the bottom of the pot, where the temperature will be the highest. If you’ve got a cake rack or a steamer rack, use it. If not, improvise; a doughnut of aluminum foil or a few chopsticks scattered helter skelter across the bottom of the pan will usually do the trick, but you know what you’ve got lying around. Be resourceful.

3. Use an instant-read thermometer to monitor the temperature in the pot–if it’s too hot, add cold water or an ice cube. Once the water is between 140°F and 145°F (60-63°C, though I actually let the temperature rise to about 67°C), add the eggs to the pot. Let them bathe for 40 to 45 minutes, checking the temperature regularly with the thermometer or by sticking you finger in the water (It should be the temperature of a very hot bath) and moderating it as needed.

4. You can use the eggs immediately or store them in the refrigerator for up to 24. (If you’re planning on storing them, chill them until cold in an ice-water bath.) If you refrigerate the eggs, warm them under piping-hot tap water for 1 minute before using,

5. To serve the eggs, crack them one at a time into a small saucer. The thin white will not and should not be firm or solid; tip the dish to pour off and discard the loosest part of the white, then slide the egg onto the dish it’s destined for.

To make a sauce, mix 1/4 cup dashi with 1 teaspoon banno-joyu (below). Use 1 to 2 tablespoons of this sauce for each egg.

Banno Joyu: Seasoned Soy Concentrate
from Washoku by Elizabeth Andoh

5 or 6 large iriko, trimmed (heads and guts removed)
8 to 10 square inches Rausu, Rishiri, or ma kombu
1 dried shiitake mushroom or stems from 3 or 4 mushrooms
1/4 cup atsu kezuri or 1/2 cup tightly packed katsuo-bushi
2/3 cup soy sauce
1/3 cup sake
3 tablespoons sugar
3 tablespoons water
2 tablespoons mirin

Place the iriko, kombu, mushroom, atsu kezuri, soy sauce, and sake in a small, deep saucepan and leave to infuse for at least 1 hour or up to 12 hours. (If you are using ordinary katsuo-bushi, add the flakes later as directed.)

Add the sugar, water, and mirin to the pan and place over low heat. When the liquid begins to simmer, adjust the heat to keep it from boiling too vigorously. As the sauce simmers, it becomes quite foamy, rising in the saucpan. Watch to make sure it does not overflow. Continue to simmer until the volume has been reduced by about one=fourth and the sauce has become a bit syrupy.

Remove from the heat. (If you are using ordinary katsuo-bushi, scatter the flakes across the surface of the liquid. Let stand for 2 to 3 minutes, until the flakes have settled to the bottom.) Pour through a coffee-filter-lined strainer or a sarashi cloth into a glass jar with a tight-fitting lid. If not using immediately, let cool, cover, and chill before using. Refrigerate for up to 1 month.


Spaghetti with Mentaiko Cream Sauce April 19, 2010

Filed under: Cooking,Japan,recipes — laurel @ 10:14 pm
Tags: , , , , , , ,


spaghetti with mentaiko cream sauce and squid at Mashimo

First of all, I’ll be honest, that’s not a picture of my spaghetti with mentaiko cream sauce. I was hungry, and my spaghetti wasn’t about to sit around and wait until I took it’s picture, so I ate it. But it was so good that I thought I should share the recipe, so here’s a picture of spaghetti with mentaiko cream sauce at Mashimo restaurant. (theirs also looks a bit prettier than mine)

My local grocery store, Apita, had a big Kyushu food festival over the weekend, which meant there were lots of vendors with famous products from Kyushu like black sugar, sweet potato desserts, tonkotsu ramen, mugi miso, and mentaiko. Mentaiko are pollock or cod eggs that are marinated with chiles, and a famous product of Fukuoka City in Kyushu. The mentaiko looked pretty good, and I had regretted not buying some when I was in Kyushu last fall, so I decided to make spaghetti with mentaiko cream sauce for dinner. These were salty, savory, and spicy, but not too spicy.

I noticed a jar of capers in the pantry when I was getting out the spaghetti and thought that the salty flavor of capers would go well with the mentaiko so I chopped up a spoonful of those and added them too. It wasn’t until after I had put the mentaiko into the hot oil that I realized that I should have removed the eggs from the membranes first. Oops. (RECIPE UPDATE: I made this again and decided that it is much better to stir the mentaiko in just before serving so that they stay raw. They are less tough and more flavorful this way.) After letting the eggs and capers cook for a few seconds in a mix of olive oil and butter, I added some milk and cream and simmered in briefly to make a sauce. Finally I stirred in the pasta and some chopped parsley and it was ready to eat. Simple and delicious!

Spaghetti with Mentaiko Cream Sauce (UPDATED RECIPE!)
by Laurel Swift

100 grams mentaiko
1 clove garlic, grated on microplane or oroshi-ki
1 teaspoon salt-packed capers, rinsed and chopped
1 to 2 tablespoons olive oil
1 to 2 tablespoons butter
1/2 cup milk and cream, mixed to your taste
200 grams spaghetti
chopped fresh parsley

Heat a large pot salted of water to a boil.

Remove mentaiko eggs from the membrane. Soak the membranes in the milk and cream that you’ll use for the sauce to save any remaining flavorful goodness. Discard the membranes.

Heat the butter and olive oil in a large frying pan or pot (A wide-bottomed pot with high sides is actually good here because the mentaiko have a tendency to pop and jump when the hit the hot oil). Add the garlic and capers and brown for about 30 seconds. Add the milk and cream. Simmer for a minute or two until slightly thickened. Turn off heat until the pasta is ready.

While you’re cooking the sauce, add the spaghetti to the pot. Cook until al dente. Drain the pasta, reserving some of the cooking water.

Add the cooked pasta to the pan of sauce and gently cook in the sauce for about a minute. Add some of the reserved pasta water or some milk if the sauce isn’t liquid enough. Just before serving add the mentaiko and stir until they are evenly incorporated. Sprinkle with chopped fresh parsley and serve.


Oden April 18, 2010

Winter is over, but the recent cold and rainy weather means it’s still a great time to enjoy oden, a long simmered mix of root and sea vegetables, eggs, tofu, and fishcakes that is sometimes referred to as Japanese comfort food. A steaming pot of oden is a great day to warm up on a cold day, so it can really get you through the winter. Another great thing about oden is that it’s even better on the second day, after all of the bits have had time to soak up the broth overnight. So you can put together the oden on a weekend when you’ve got time, park it in the fridge for a night or two, and then reheat it to enjoy it during the week.

I made oden for a party, but when you’re making oden for eight the hardest part might just be finding a pot that’s big enough to simmer all that stuff in. I made do with a two-pot arrangement where I used one pot to blanch the age-mono (fried things like fish cakes, fried tofu, and tofu pouches which need to be simmered to remove the frying oil), konnyaku, and boil the eggs and a second, broth-filled pot. When I had finished blanching ingredients and boiling eggs I split the broth into two pots and simmered all of the ingredients for about 3 hours. In fact, even with my two largest pots, there wasn’t quite enough room to fit the eggs in the pot, so I just put them into the storage containers to absorb the flavor of the broth overnight. Actually, this proved to be a stroke of luck because the eggs were flavorful but still had a nice, slightly soft orange yolk since they didn’t simmer for so long with the rest of the goodies.

So there’s about half of my party oden at the top of the page: two types of age kamaboko, konnyaku triangles, daikon, carrot-gobo kamaboko, shiitake mushrooms, thick fried tofu, hampen, boiled eggs, shirataki bundles, chikuwa, age-tofu pouches filled with mochi or egg and tied with kampyo, shrimp surimi balls, and kombu. My favorites are the carrot-gobo kamaboko, eggs, shirataki, and stuffed age-tofu pouches. Another tasty idea from Jiman no Nabe Ryori is Nagoya style oden made with the usual suspects, plus skewered beef tendon and a rich, Hatcho miso broth.

Typically oden is served with sinus-searing karashi mustard, but not being partial to such an intense burn, I also mixed up a slightly sweeter and milder mustard-miso mix to go with mine. (more…)


Honeymoon Miso Dressing February 10, 2010

Filed under: Cooking,Japan,recipes — laurel @ 10:13 pm
Tags: , , , , , , , ,

I take Japanese lessons on Thursday nights and it’s nearly 7:00 by the time I get home, so I usually ask Alex to make dinner on those nights. A few weeks ago my teacher cancelled our lesson so I wouldn’t have to bicycle there in the cold, raging wind. I asked Alex if there was anything I could do to help with dinner; he said, “I found an interesting looking salad recipe online, so why don’t you make the dressing.” I got out the ingredients and started to measure. “Hey, this recipe looks awfully familiar,” I said, and he answered, “It should, you wrote it.”

It turned out that the recipe was Shiitake and Edamame Salad with White Miso Vinaigrette, which I created for Sunset magazine’s reader recipe contest in 2006. The recipe contest was advertised in the magazine as a chance to win a dream vacation. The prize vacation for the salad category was a trip for two to Kauai. Kauai sounded like a wonderful place, but salad… hasn’t every combination of fruit, vegetable, and dressing already been published? I remembered standing over the blender late one night, measuring spoons in hand, trying to get inspired to create a stellar salad.

I knew I liked honey-miso dressing: seasoned with sesame and a bit of soy sauce, but with its heavy dose of sesame oil, sometimes it tastes a little heavy. I spied a navel orange in the fruit basket. Mmm… citrus and miso, now that sounds good. Into the blender went the orange juice. For the miso, I decided to use just white miso, not a heartier, saltier red miso. I blended those with rice vinegar, honey, and shallot, then drizzled in a mix of vegetable and sesame oil to make a creamy, golden dressing. The rest of the salad, I admit, was just what was in my refrigerator: shiitake mushrooms, leftover edamame, some thinly sliced green onions. I put it together and Alex and I tasted it: pretty good, but it needed some more color. “Baby beet greens,” I wrote in the recipe; it was a long shot. Who even has beet greens anyways? Well, I do in the spring if I’m growing beets, but I certainly didn’t expect that anyone would go out and buy them.

I typed up the recipe, sent it off (as usual, just before the deadline), and forgot all about it. Imagine my surprise when I heard from Sunset’s editors a few months later. I was so excited, and we really did use the prize money to go to Kauai for our honeymoon the next summer.

Alex still loves this dressing, and making our own dressing is cheaper than buying bottled dressing at the store (what a waste!). I’ve made a few improvements over the years. I think the most important thing is to use freshly squeezed orange juice. In fact, if you have the orange’s zest, add that too. I have made the dressing with bottled orange juice, but the flavor just isn’t the same. If you must use bottled juice, add some lemon juice or vinegar to give it a little extra zip. I use Kyoto’s sweet, light, Saikyo miso. I switched from rice vinegar to a milder brown rice vinegar and the dressing was a bit on the sweet side. The balance of acid and sweetness will vary between different vinegars and miso so you’ll have to adjust the amount of honey to your own taste. Finally, less is more with the shallot—the dressing will be thick and have an assertive oniony funk if you add too much. If you don’t have shallot, don’t worry about it, try seasoning the dressing with a bit of ginger or even myoga instead.

I noticed that Sunset recently published a similar very recipe that added tahini and adjusted the amounts of vinegar and honey, so it looks like they’ve been making improvements too.

Back to the other night: since it was vegetari-ish night, we had large servings of the salad for dinner. Alex came up with a great way to add more protein and crunch at the same time. Deep fry sheets of abura-age, drain well, and season lightly with salt. Chopped up, they’re like high-protein croutons (maybe we can call them tofu-tons 😉 ).

Honeymoon Miso Dressing
by Laurel Swift

1 small shallot
1/3 cup freshly squeezed orange juice
2 tablespoons soy sauce
2 tablespoons high-quality rice vinegar
2 scant tablespoons honey
2 tablespoons Saikyo miso
3 tablespoons grapeseed or vegetable oil
3 tablespoons toasted sesame oil
1 tablespoon toasted sesame seeds.

Roughly chop the shallot. Add the shallot to the orange juice, soy sauce, vinegar, honey, and miso. Blend until smooth. Next, drizzle the vegetable and sesame oil into the dressing with the blender running. The dressing should be creamy and slightly thickened. Finally stir in the sesame seeds. This recipe makes a generous cup (about 300 mL) of dressing.

*Tip: I make my dressing with a tall, half-liter measuring beaker and a stick-blender. It’s just the right size and easier to clean than a standard blender.

Honeymoon Miso Salad

1 head butter lettuce, washed and torn into bite-sized pieces
2 sheets abura-age (thin fried tofu)
10 medium shiitake mushrooms, or substitute king oyster, maitake, or other mushrooms
vegetable oil
salt
1/2 cup shelled, cooked edamame (frozen edamame are fine)
3 scallions, sliced thinly on the diagonal
orange segments
Honeymoon Miso Dressing

Fill a pot or wok with vegetable oil about 1-inch deep. The oil should be hot enough to sizzle when you add the abura-age. Cut the abura-age into strips and fry them one sheet at a time until they are crispy. The abura-age will float, so use wooden chopsticks or tongs to flip them. Drain well on paper towels and season lightly with salt.

Slice the mushrooms about 1/4 inch thick. In a frying pan, heat about 1 tablespoon of oil (You can use a bit of the frying oil). Add the mushrooms, season with salt, and cook, stirring occasionally, until browned.

In a large bowl, toss the lettuce with 2 tablespoons of dressing. Pile the dressed greens on large plates. Top with mushrooms, fried abura-age strips, edamame, onions, and oranges. Sprinkle with more sesame seeds and serve the remaining dressing on the side.


A new year, a new plan February 4, 2010

A new year is beginning, and we decided quite a while ago that this will be our last year in Japan. That’s right, we’re going home (or somewhere new) in August. As the days pass, I can see the signs of the seasons changing. In the fall, we had our last gorgeous Japanese grapes, our last Japanese persimmons, our last Japanese nashi. Apples are still plentiful at the store, but they’re not as crisp and fragrant as the fall varieties. Just the other day I saw the first ume blossoms of the year. Our last ume (though these will be blooming for months still).

Thinking about all of the wonderful sights, smells, and tastes in Japan that come and go with the seasons, I couldn’t help but realize that we’ve fallen into a routine. I try to make interesting, exciting dinners, but our fall-back easy dinner is rice, salad, miso soup, and grilled salted fish. Ichiyaboshi hokke, shio-jake, shio-saba, sometimes a miso-zuke or kasu-zuke gindara… but the routine is always the same: out of the package and into the broiler. There are so many delicious varieties of fish and seafood available here; they’re super-fresh and really cheap compared to back home in Colorado. So I’m on a mission to eat seafood twice a week. Why twice a week? Well, that’s because burnable garbage day is twice a week (Monday and Thursday), and twice a week will demand some creativity whereas once a week I could fall victim to my own routine-loving laziness. So seafood night is Sunday and Wednesday (so I can put out any bones, shells, or guts in the next day’s trash). It’s not just good for my tastebuds, seafood is full of good stuff like protein, omega-3s, and vitamin E. And seafood is easier on the environment (in some ways) than meats like pork and beef.

Of course, I don’t want my new dining plan to be wreaking havoc on the seas, so I’ll try to stick to sustainable fish as much as possible. My go-to source is usually Monterey Bay Aquarium’s seafood watch list. Of course, their lists are for customers based in the US, so it’s a little more challenging to find out what’s a good choice and what’s to avoid in Japan, but I’ll do my best. Luckily, I can find the country of origin labeled right on every package at the store here.

While we’re at it, we’re also having vegetari-ish night once a week too. So far it’s been Mondays, but I may be moving my weekly Japanese lessons to Monday night so vegetari-ish night will have to get the boot (probably to Thursday or Saturday). Vegetari-ish night means a mostly vegetarian meal, but since we’re not strictly vegetarians ourselves I’m willing to make exceptions for some flavorful background players like dashi, fish sauce, Worcestershire sauce (well, I don’t have any anyways, but if I did it would be ok), oyster sauce, small amounts of tiny dried shrimp or scallops, or stock (since it’s made from an item that would otherwise be wasted; plus my freezer is tiny, so I can’t keep my chicken stock around forever… if I’ve got it, I’ll use it). There is some continuing debate over whether a small amount (an ounce per person) of bacon, say in a lentil soup or veggie chowder, would still meet the goals of our plan, but we’ve had enough other veggie meals in the week that a little bacon hasn’t thrown any kinks into the plan yet.

So far (well, it’s only been a few weeks), seafood night and veggie night have been a big hit. I feel like I’m thinking more creatively and we’re enjoying the bounty that’s available locally. And I feel like we’re eating more healthily and environmentally.

The inaugural veggie night dinner was saag paneer with homemade paneer (it was a holiday–this is definitely not an after-work recipe if you’ll be making the paneer yourself). The paneer recipe is adapted from Jeffrey Alford and Naomi Duguid’s Mangoes and Curry Leaves, and the saag recipe is based on Madhur Jaffrey’s recipe and this recipe from Olive magazine. Instead of water, I used some of the leftover whey from making paneer as the liquid in the recipe. I liked being able to use something that would have gone to waste otherwise, but it was a little bit more sour than I expected (because of the vinegar in the whey). In the future I’ll probably use a 50/50 mix of whey and water.

Saag Paneer

1 liter milk
1 tablespoon fresh lemon juice or vinegar (I use rice vinegar)

1 to 2 bunches fresh spinach, washed and trimmed
vegetable oil or butter
1 yellow onion
5 garlic cloves
1 to 2 inch piece of fresh ginger
salt
1 tablespoon tomato paste
seeds of 10 cardamom pods
6 cloves
1 tablespoon ground coriander
1 tablespoon ground cumin
1 teaspoon turmeric or curry powder
1/2 teaspoon freshly ground black pepper
dried New Mexico green chile powder to taste
1 cinnamon stick
2 bay leaves
1 teaspoon garam masala

Place the milk in a large pot and heat over medium heat, stirring occasionally to prevent sticking, until it’s just below the boil. Take off the heat. Add the lemon juice and stir with a clean wooden spoon. You will see the curds separate out, looking like blobby bits floating on the surface. Keep on stirring the milk for several minutes, then set aside.

Moisten a piece of cheesecloth or loose-weave cotton cloth (I use Japanese sarashi cloth), place a sieve over a large bowl, and line it with the cloth (fold the cheesecloth so you have several layers to line the sieve). Pour in the the milk mixture. Pour cold water over it to rinse off the taste of the souring agent, then let drain. The liquid will gradually drain through the curds into the bowl: pull the cloth tightly around the curds to press out extra liquid, or tie the top of the cloth to make a bag and hang it on a hook over the bowl to drain. You will have soft moist cheese in about 30 minutes. Transfer to a clean bowl and scrape any remaining curds off the cloth into the bowl.

Next, working with clean wet hads, shape the curds together into a square block. Wrap tightly in cheesecloth or a clean cotton cloth and place on a plate. Put a heavy weight on top to press the moisture out of the cheese. From time to time, pour off any liquid that has accumulated. After 4 hours or so, the cheese will be very firm and drier. Make the paneer a day ahead of time or set aside while you make the saag.

Chop the onion, ginger, and garlic finely. I use a stick blender in a tall, glass measuring cup. Or use a food processor. Blanch the spinach in a large pot of boiling water and then chop (I don’t have a food processor, but you could use one here to chop the spinach finely). Grind the cardamom seeds and cloves in a spice grinder (you can use whole spices, but then you would need to fish them out before you puree the saag. Of course, it’s not a problem if you puree the spinach in a food processor before adding it to the pot. Hmm…).

Heat a large pot over medium heat. Add a bit of butter or vegetable oil. Cook the onion, garlic, and ginger with a pinch of salt until softened and golden. Next add the tomato paste, cardamom, clove, coriander, cumin, turmeric, black pepper, chile powder, and cinnamon stick. Stir and cook for about a minute until fragrant. Add the chopped spinach, bay leaves, and about half a cup to a cup of water. Stir and cook until the spinach becomes tender and well-cooked (at least 20 minutes). Stir occasionally and add more water as necessary. If you haven’t yet, fish out the bay leaves and cinnamon stick and puree the saag. Be careful, it’s hot! Add garam masala and season with salt to taste.

Cut the paneer into bite-sized cubes or triangles. Heat some oil in a cast iron frying pan. Add the paneer to the pan and brown. Turn and continue cooking until hot and browned. Add the paneer to the saag and stir gently (the homemade paneer may crumble easily).

Serve hot with naan or rice.